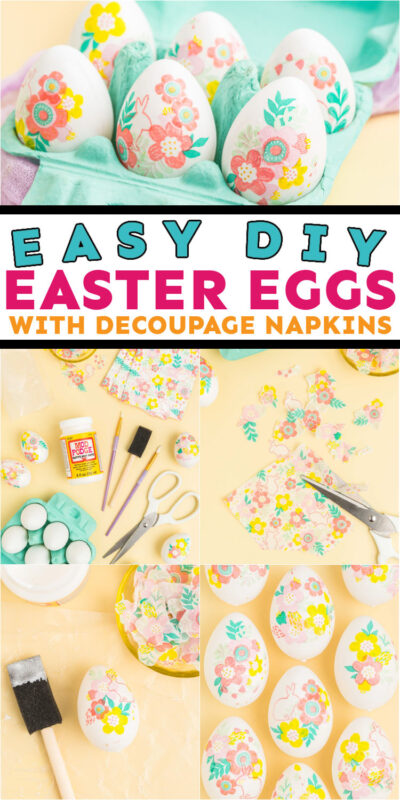
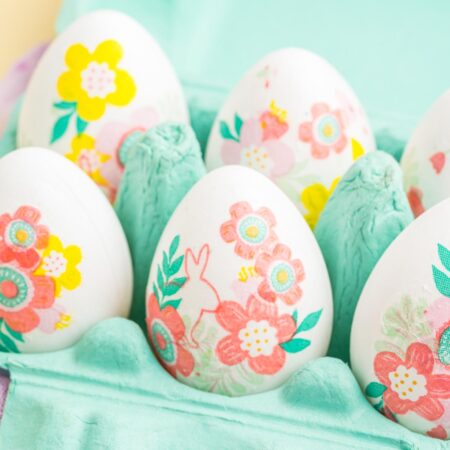
One of our favorite Easter traditions is decorating Easter eggs but instead of just doing the regular Easter egg dying this year (we’re doing that too), I thought it’d be fun to use decoupage napkins to make some pretty decorative Easter eggs to put around the house too! While these look like they may be complicated, they’re actually really easy to make – I just recommend having an adult cut out the little pieces of napkin before letting people add on the pieces to their eggs! Making these was one of the most fun Easter activities we did all year and a good change of pace from the crazy Easter games that we’re used to. Although we of course did those too – just not back to back! You could even do these decoupage Easter eggs and then make these Oreo Easter eggs – the closest to an edible Easter craft you can get! Or how about making some of these and using them for a perfect pattern Easter egg hunt idea!
Why You’ll Love This Craft
Easy – as long as you can cut, you can make these eggs! It’s literally as simple as layering pieces of napkin on top of each other and adding translucent Mod Podge on top. It’s pretty hard to screw up! Customizable – my personal favorite thing about these is that you can really make these into any design you want. Choose different colors and styles of napkins to make all sorts of Easter designs! How about trying a butterfly or rose that would match these Encanto Easter baskets – they’d be gorgeous! Or you could even do something a bit more shabby chic. Relaxing – while some crafts are a bit stressful, these are actual super relaxing, kind of like filling in coloring pages!
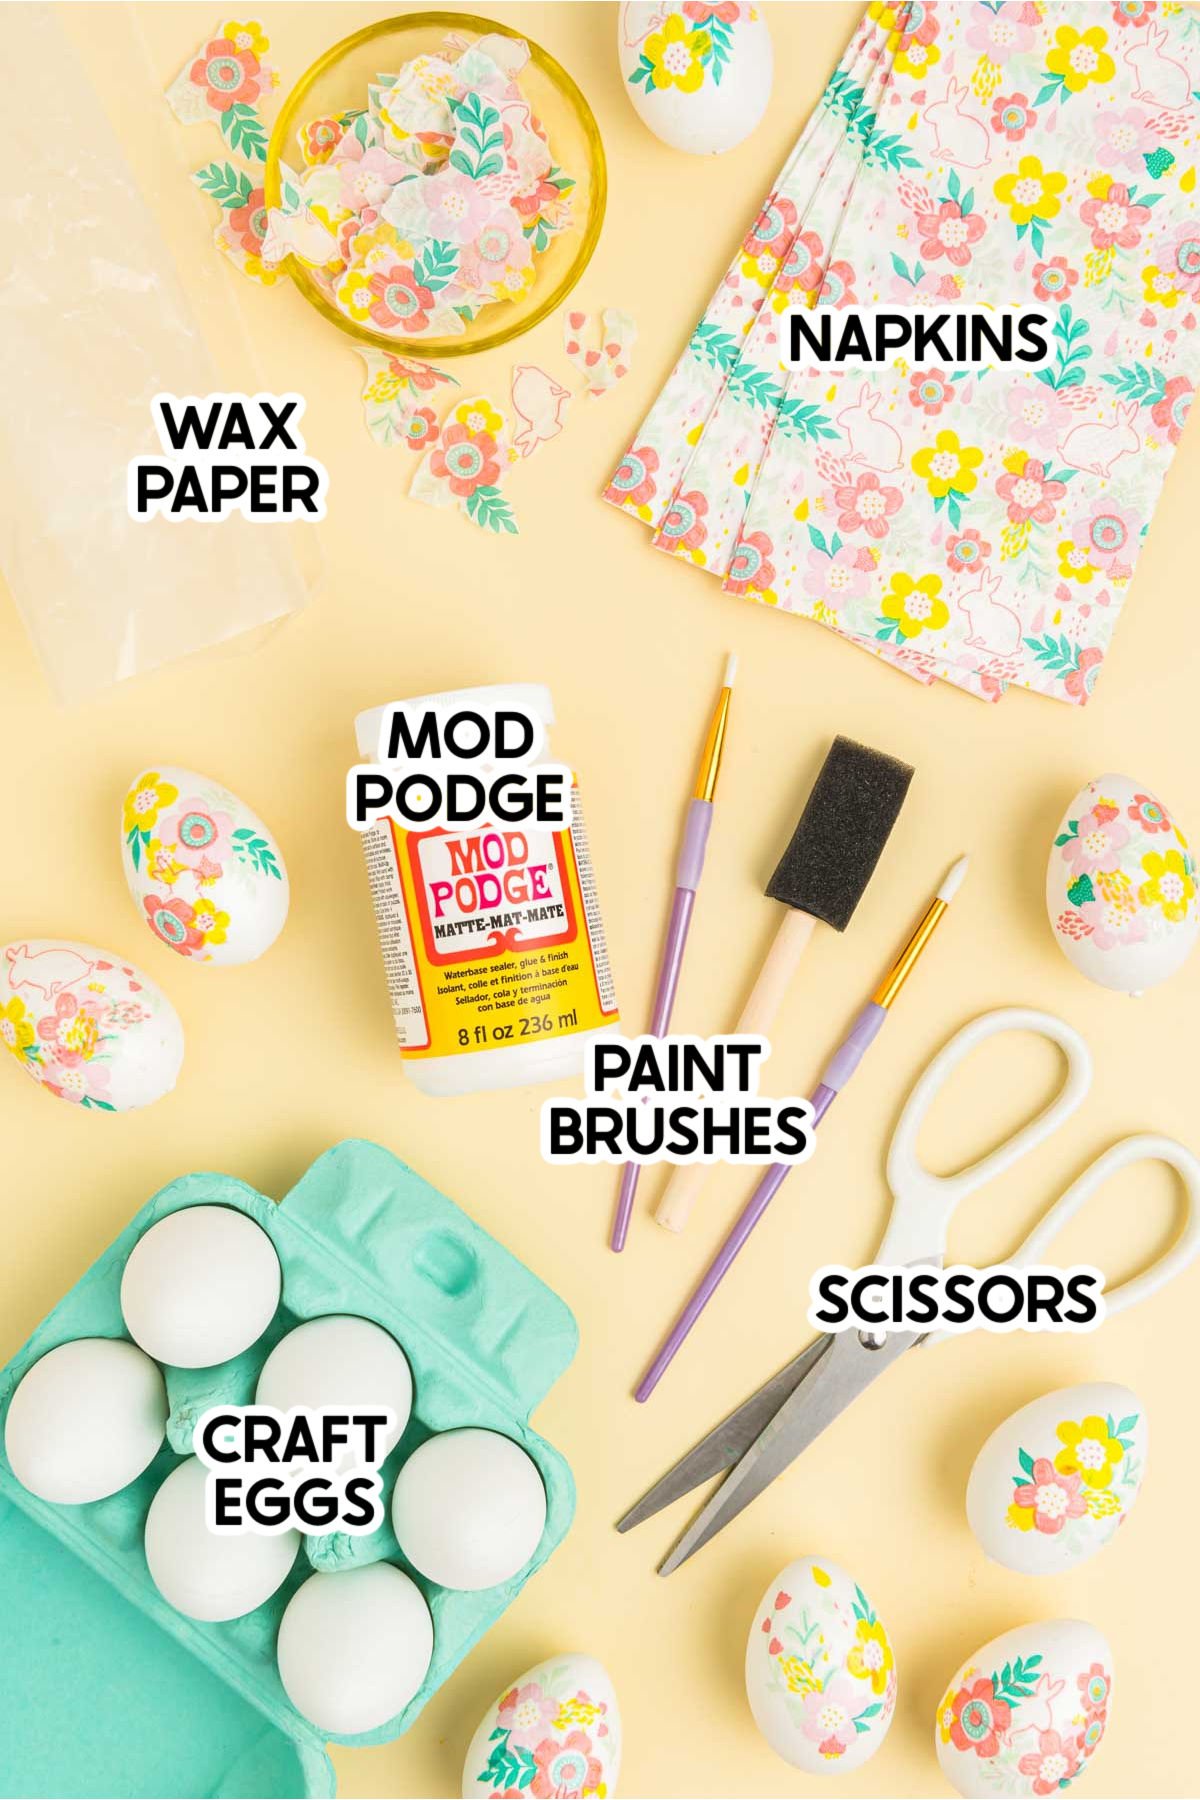
Supplies
Supply Notes
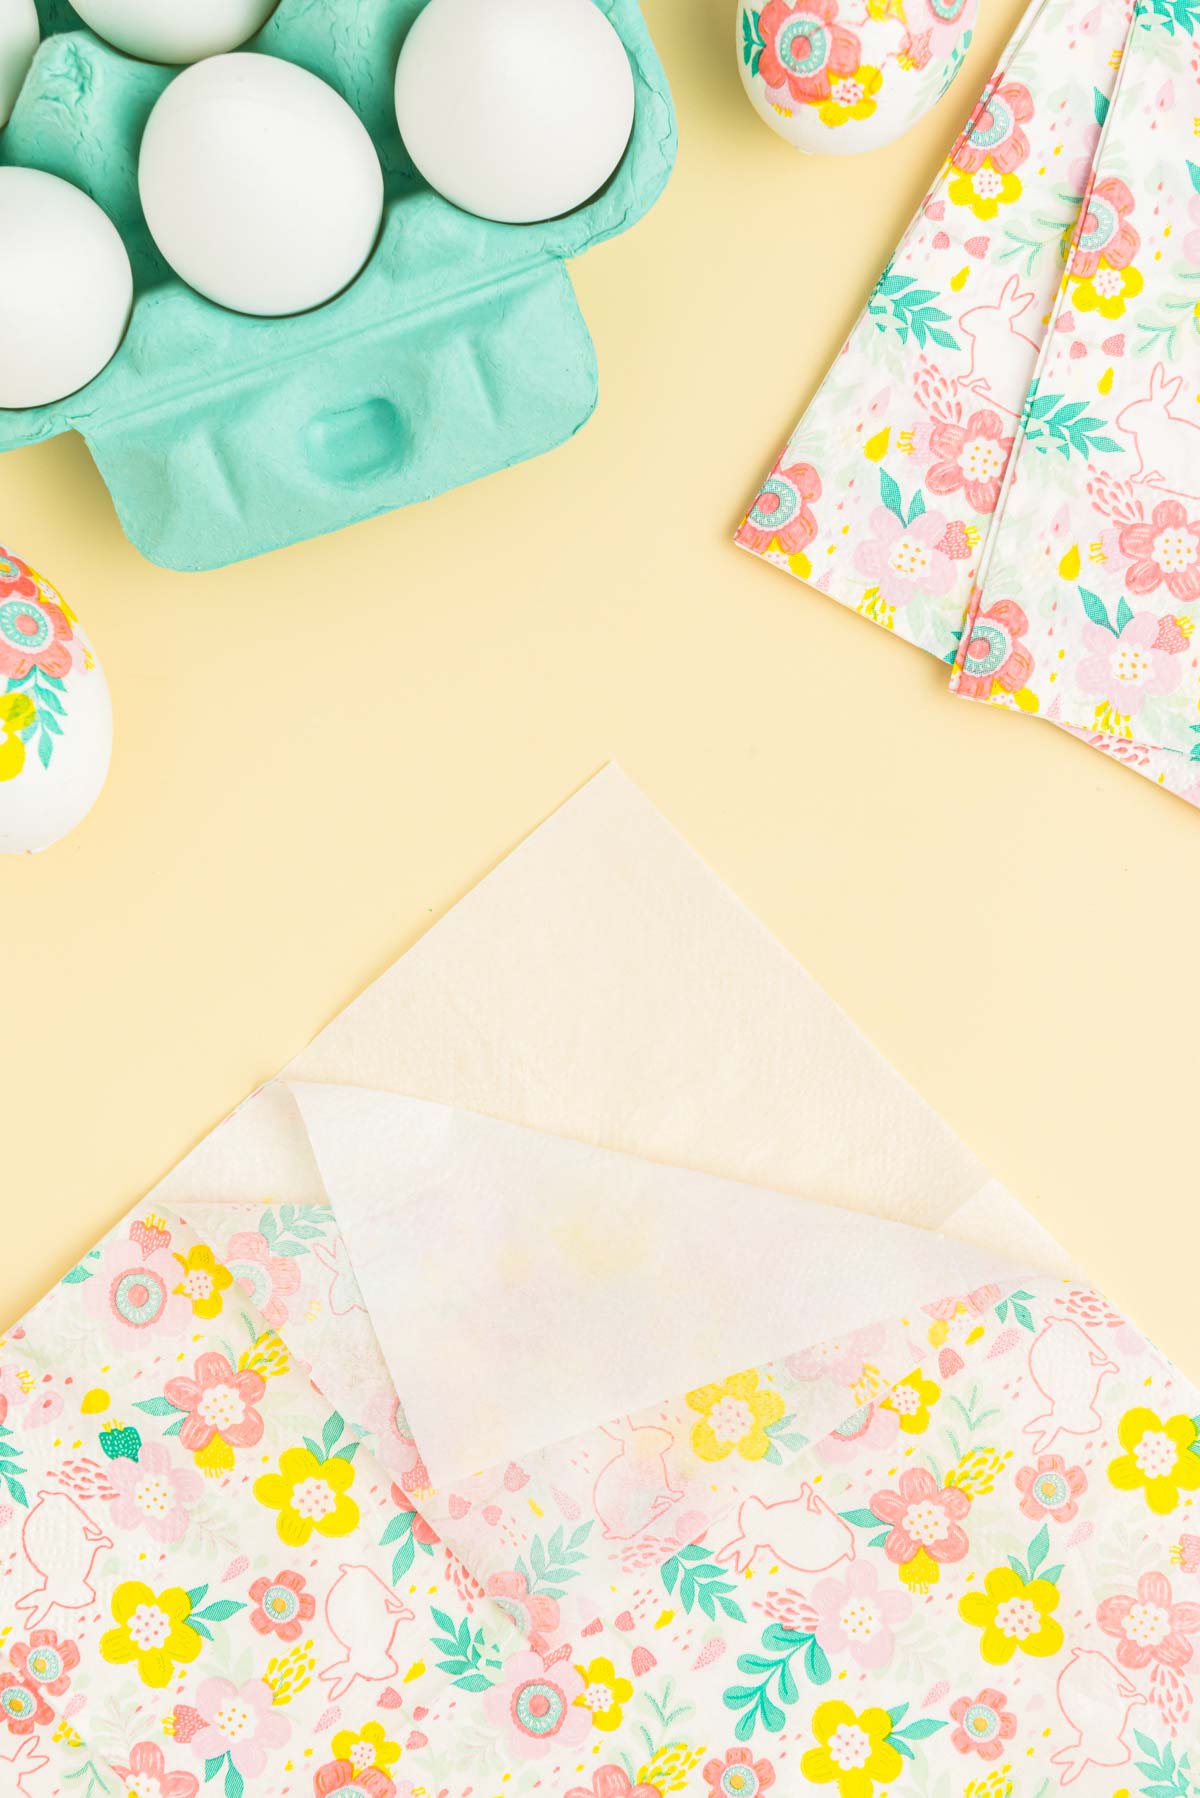
Napkins – the most important part of this craft is getting the right napkins. You need napkins that are either 2-ply or 3-ply so that you can take the design piece off and leave the second (and third) layers behind. I also highly recommend ones that have a white background so that it looks like it fades right into the egg. Lots of fun colors and designs are great too. I personally used these floral napkins because of all of the fun designs and colors. Mod Podge – I recommend using matte Mod Podge for these so that you can a nice polished version without a lot of shine. Gloss works as well if that’s what you have on hand. Craft eggs – you can use natural, plastic, or wooden eggs for these. I used regular size eggs but you could also do jumbo craft eggs if you want to do some larger designs. Paint brushes – I recommend having both a foam paint brush (for adding on the Mod Podge) and a small paint brush to smooth out the small pieces of the design. Scissors – you’ll want to use sharp scissors for these (that’s why I recommend having adults cut the shapes out first) so that you cut right around the designs. That’s a little tough to do when you’re using kid scissors. Wax paper – you can use wax paper or even parchment paper works, it’s just somewhere to place your eggs while they’re drying. You could also use an empty egg carton as well. Or use those empty egg cartons for these tissue paper butterflies and let them dry on the wax paper.
How to Decorate Easter Eggs with Decoupage Napkins
Okay so these are pretty easy to make but there are some tips that will help give you a better finished result! They’ll be cute regardless, but I’ve included step by step instructions to help you get that polished look I’m sure you’re looking for!
1 – Prep the Napkins
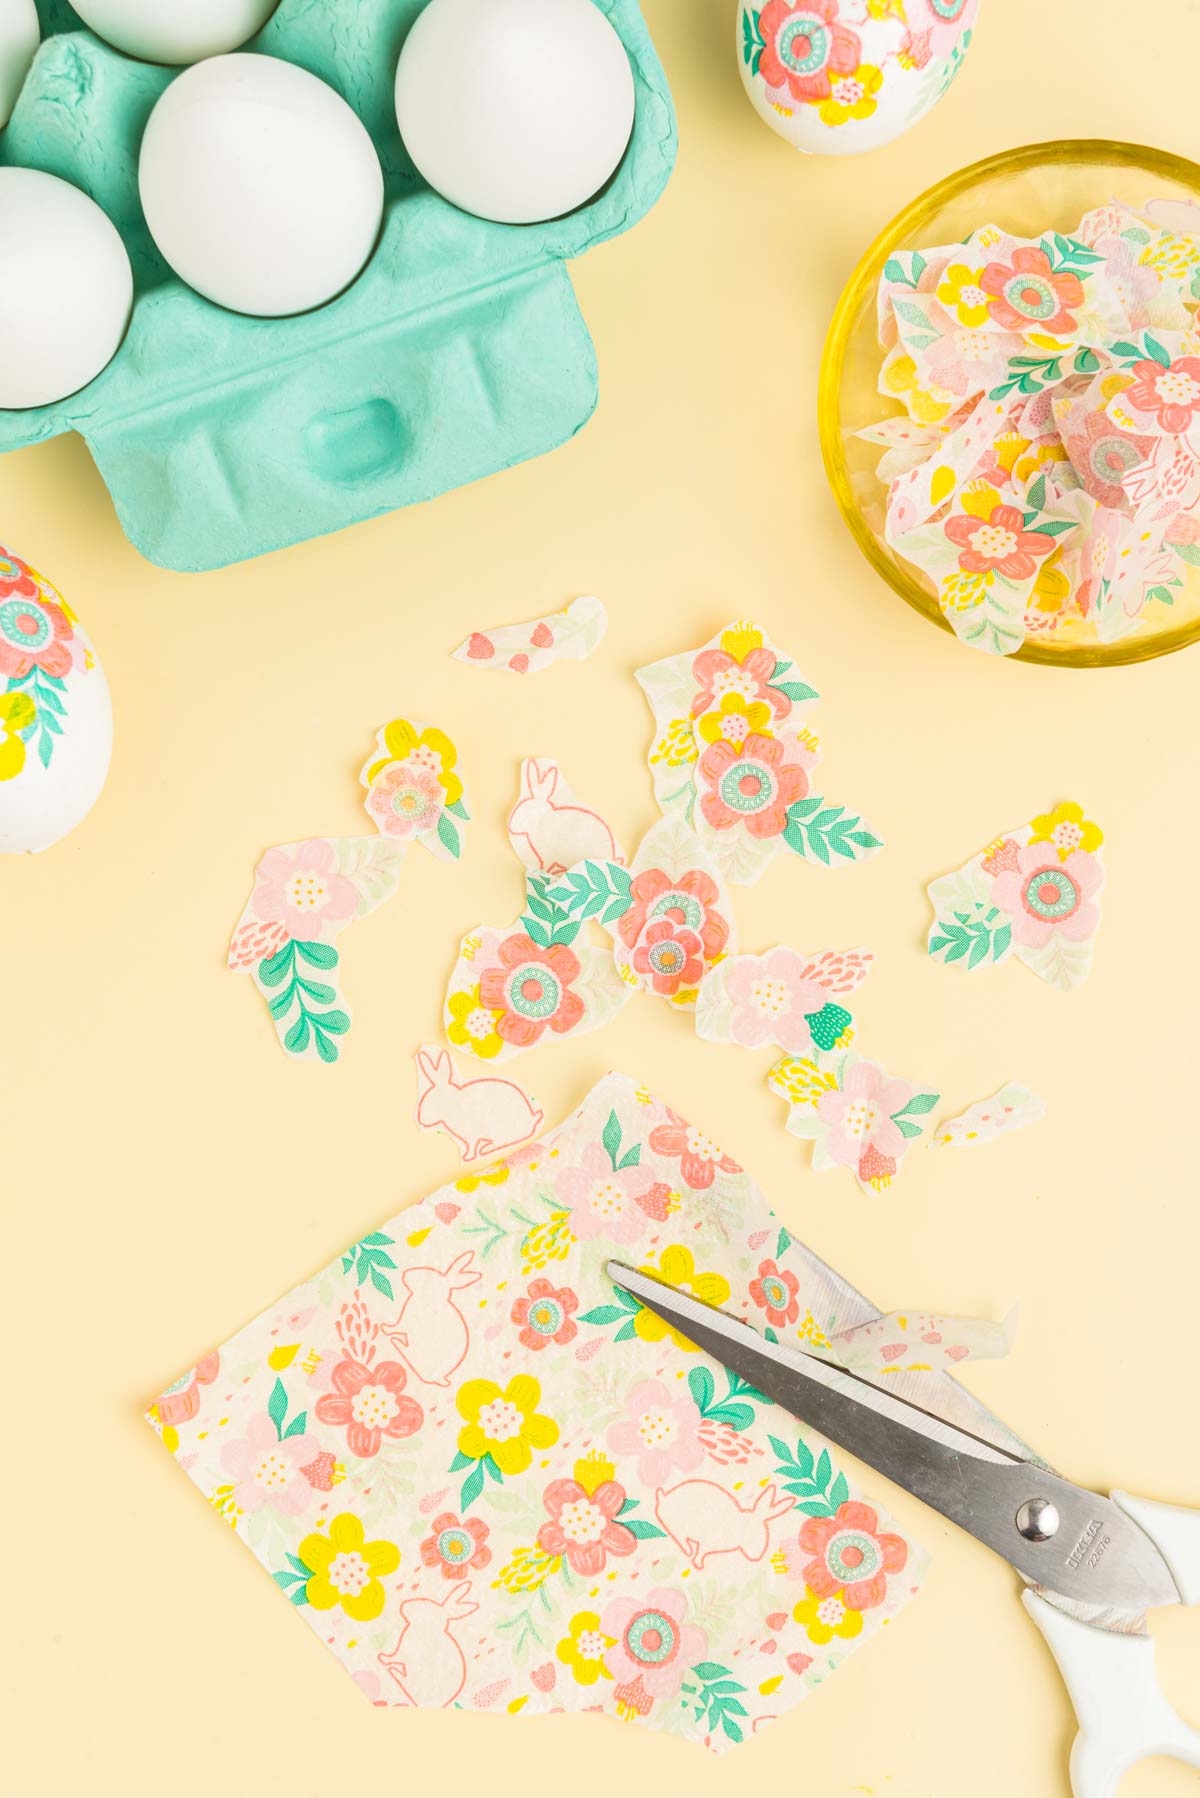
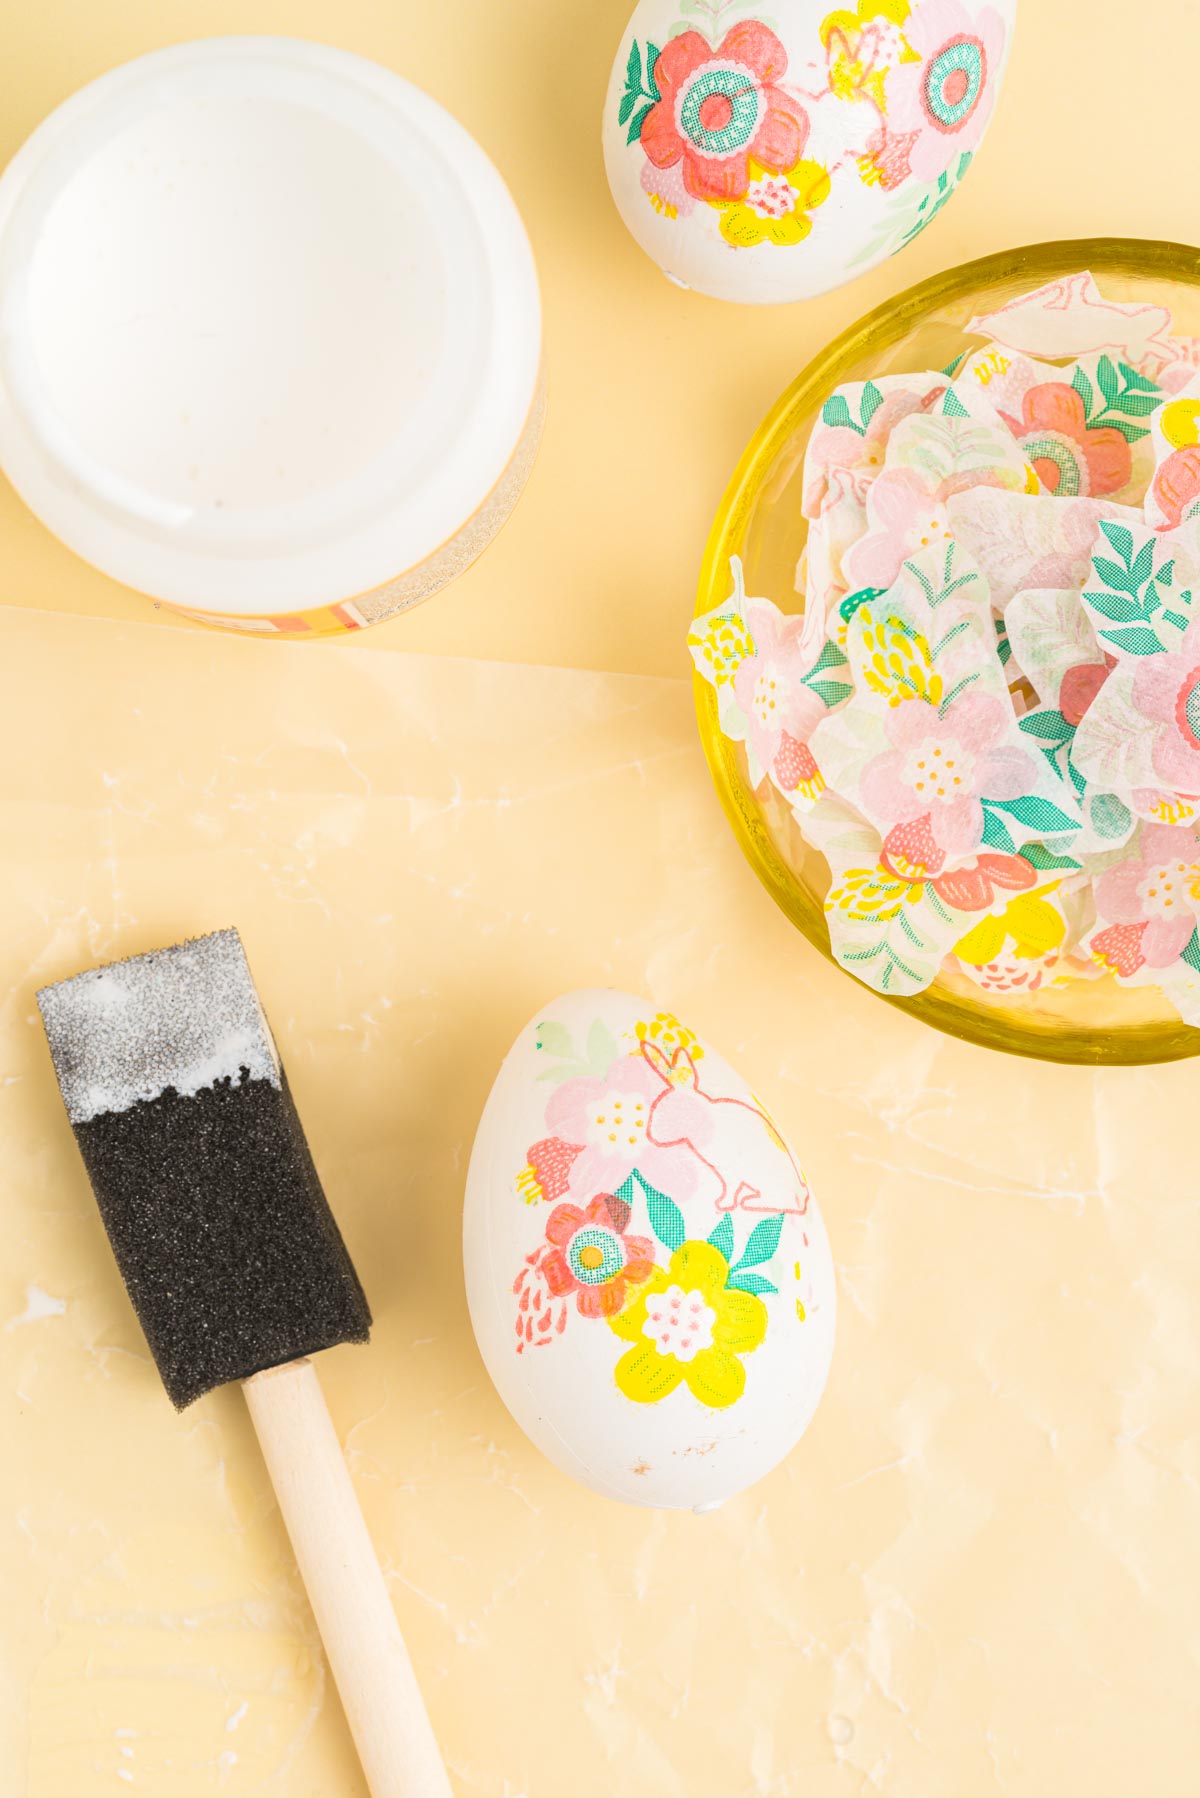
Separate the printed layer from the back layer of the napkins. You want the thin front layer with the design as this is going to be the best for overlapping and affixing to your egg. Using sharp scissors, cut out individual elements from your napkin that you’ll want to put onto your eggs. I recommend cutting out as small of pieces as possible since these work best for adding to the eggs. Using smaller pieces of the napkin and smaller images makes these much easier as the larger designs tend to crease more when you add them to the eggs. While you don’t have to cut out each design to the line, I do recommend cutting them as small as possible with just a little white napkin left around the edges, as you can see in the image below.
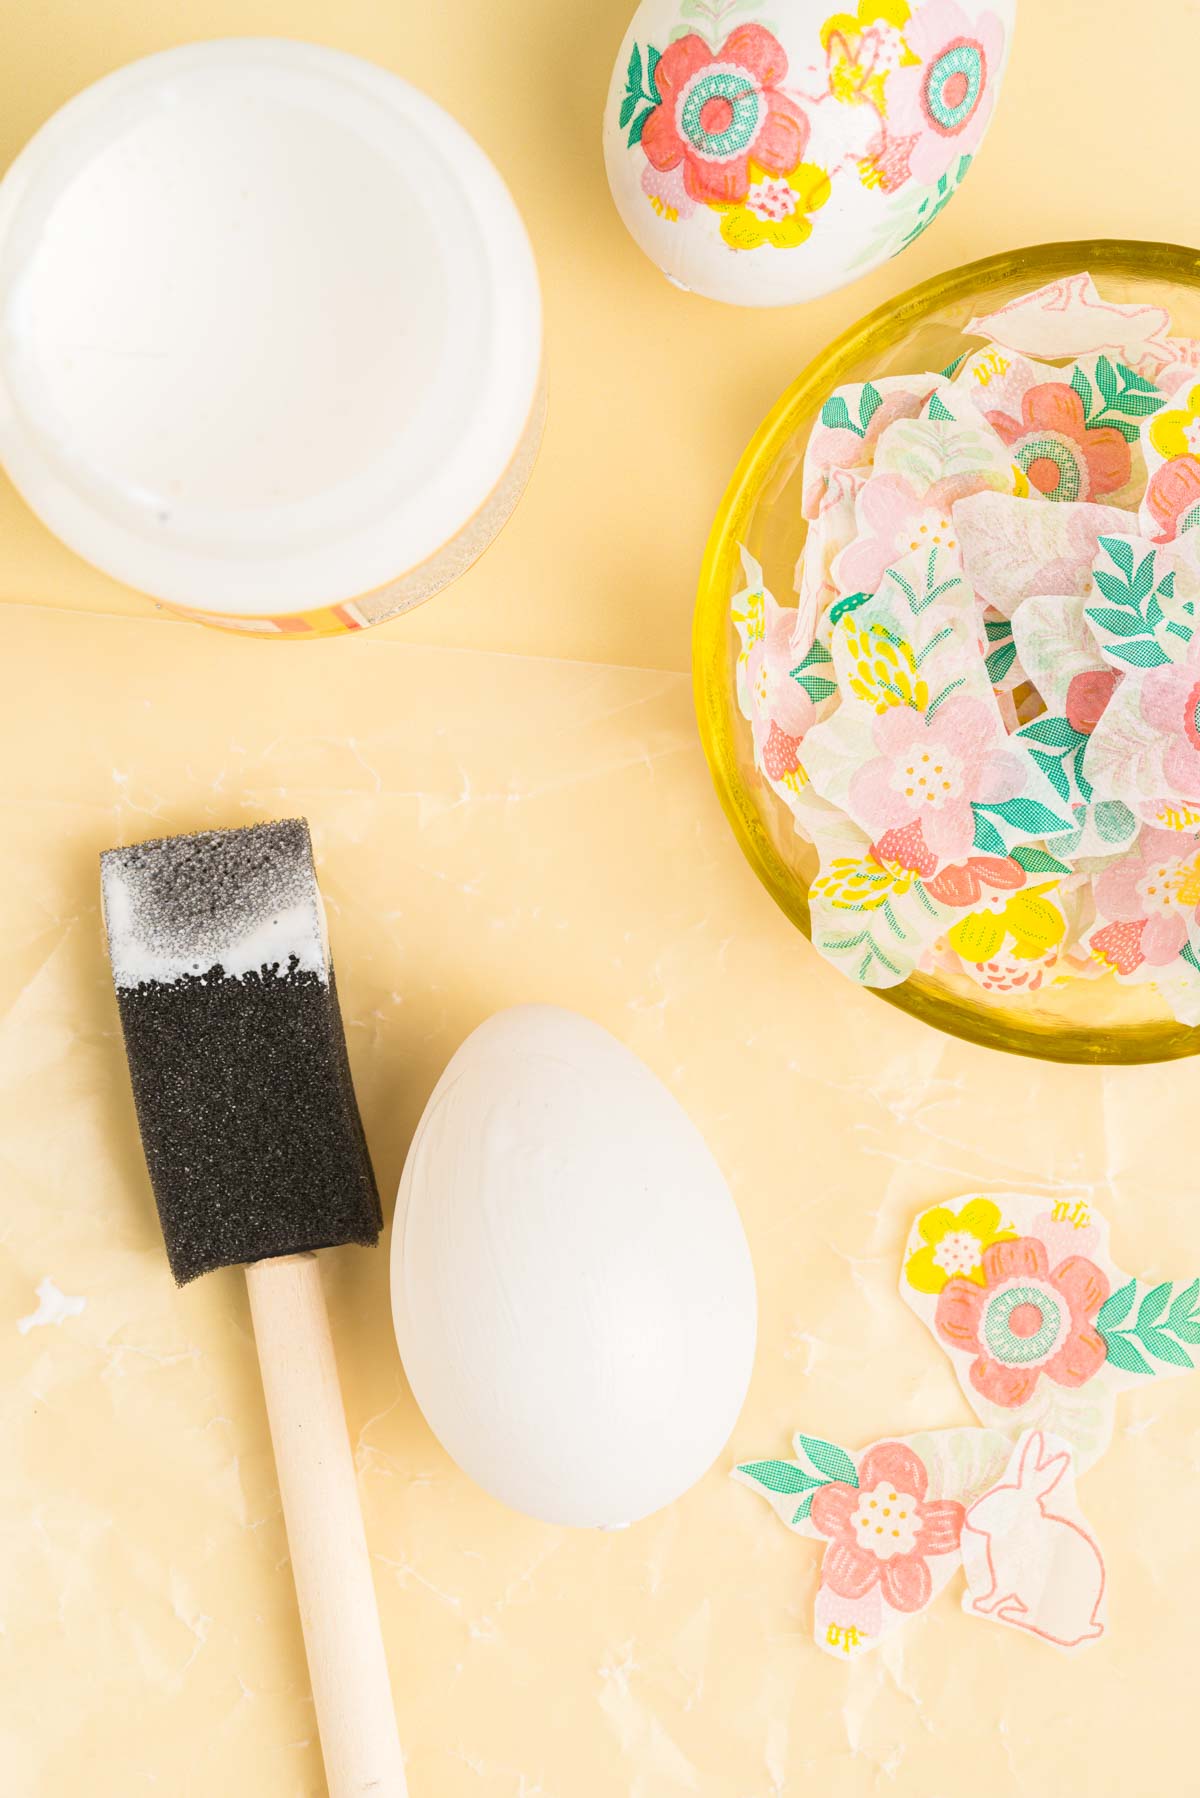
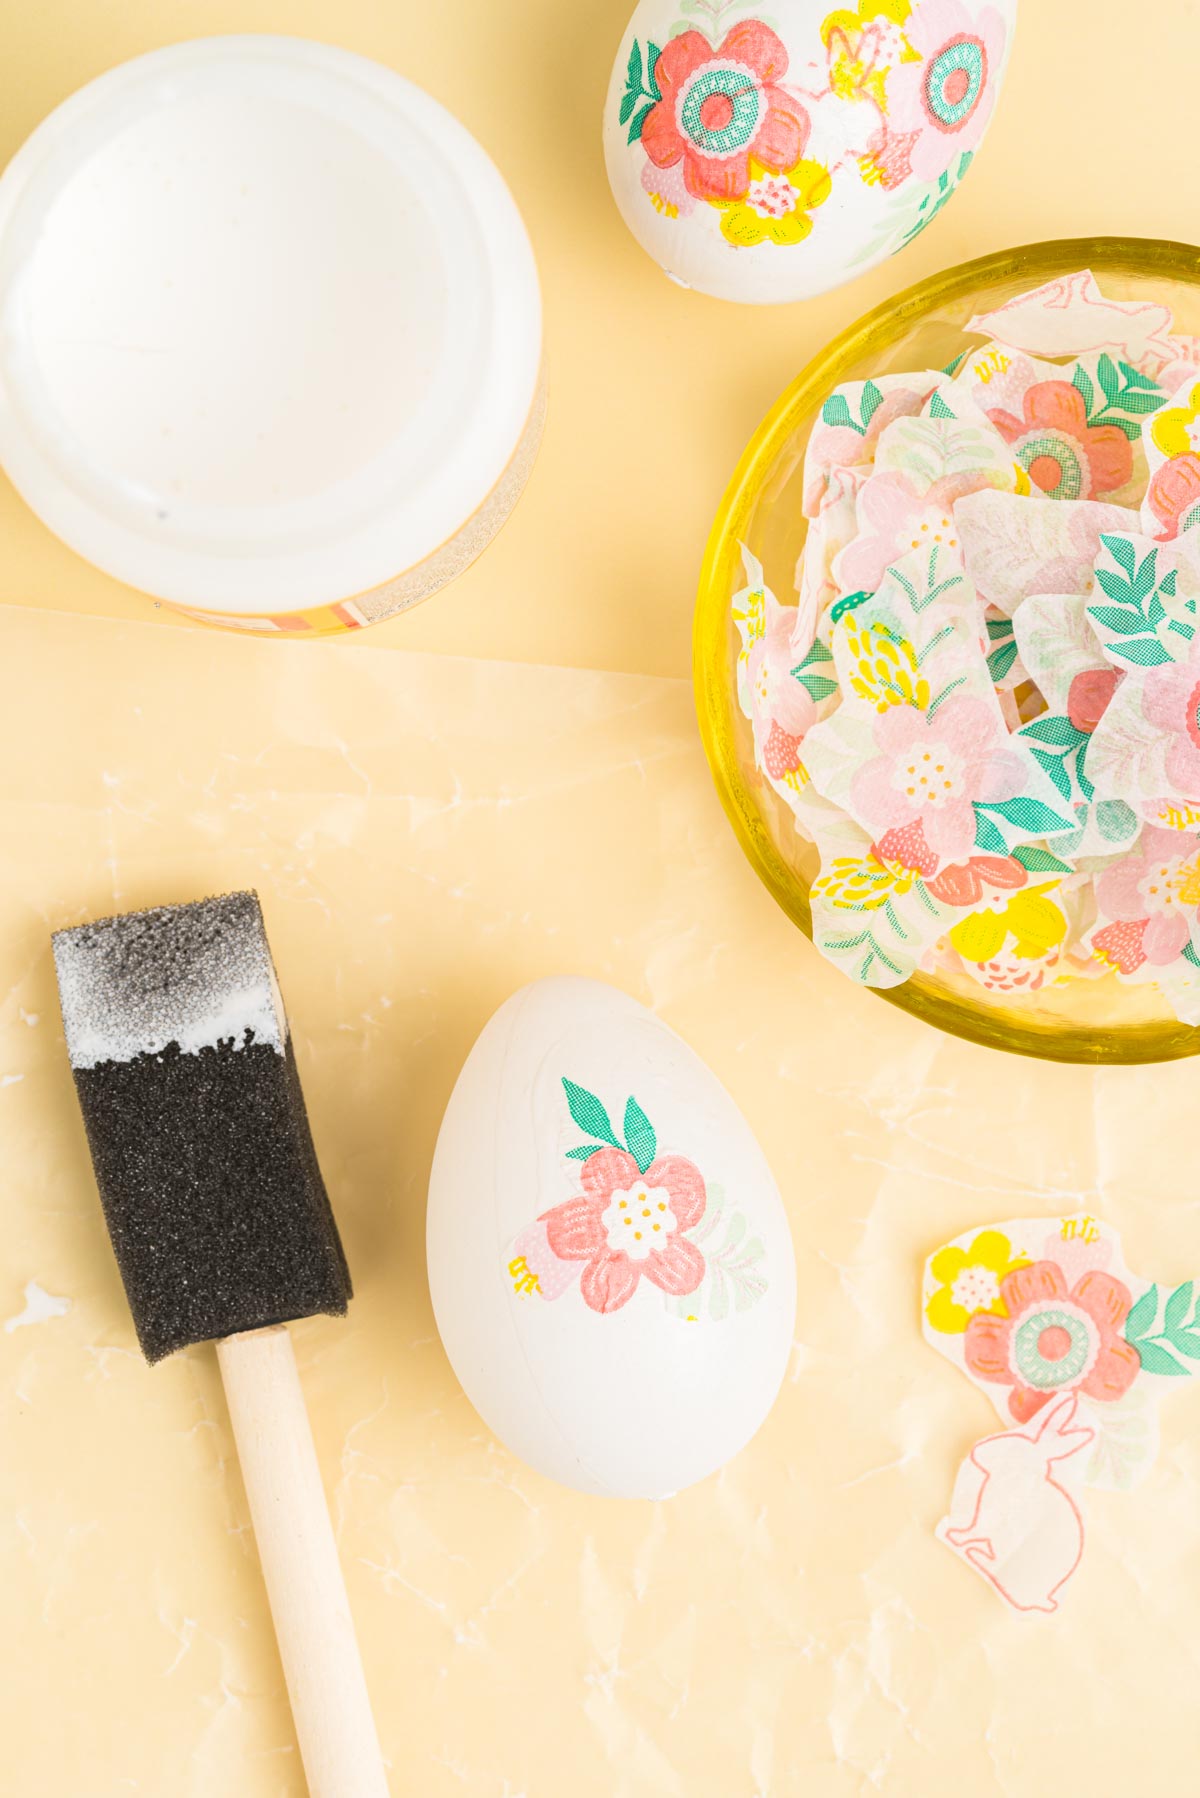
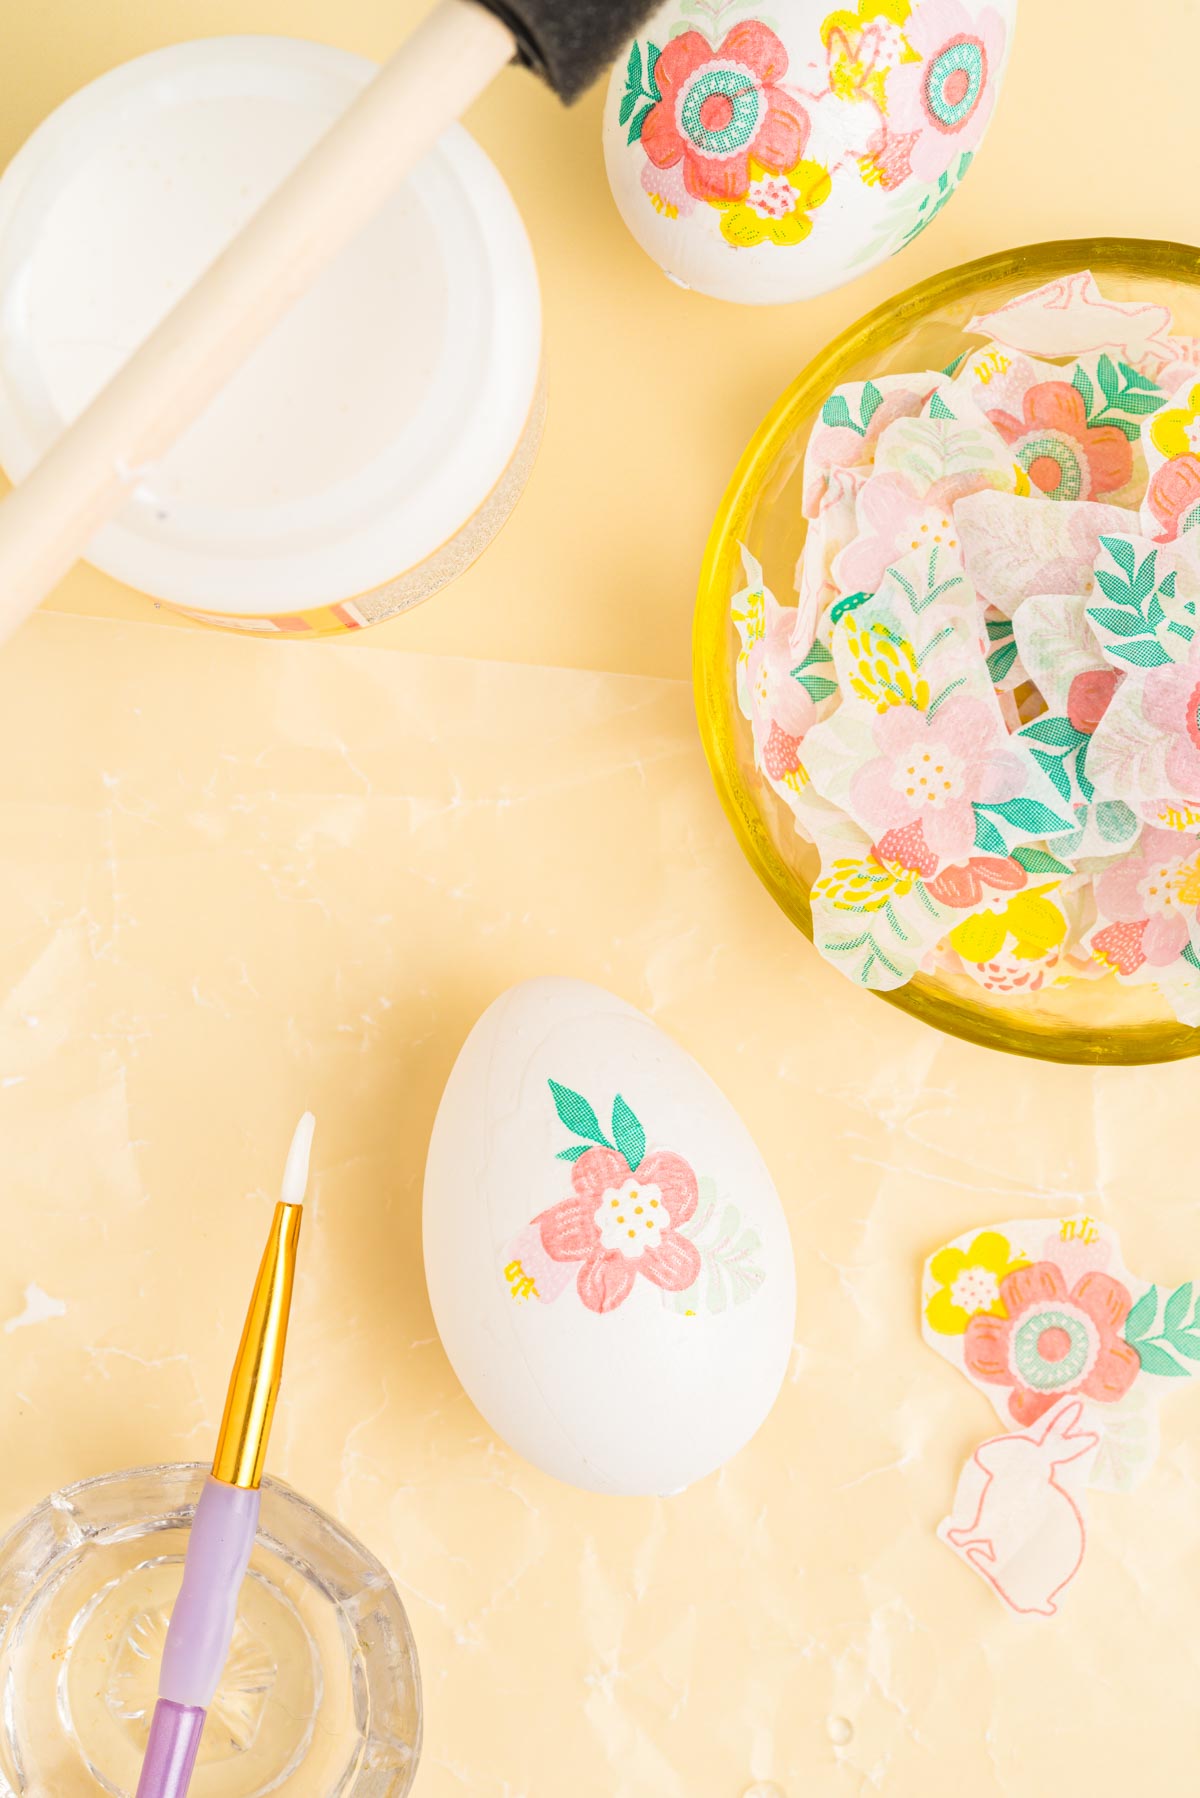
2 – Finish Your Decoupage Eggs
Once you have all of your designs cut out, it’s time to decorate those eggs! Whether you’re using wood, plastic, or natural eggs – the process is the same. Use the foam paint brush to add some of the Mod Podge on the egg. I recommend working in sections and just adding Mod Podge to a part of the egg that you’re going to cover so that you have somewhere to touch the egg without getting it all over your hands. Brush it on in a nice even layer so that you don’t have a lot of bumps and creases in the Mod Podge layer. This will help the paper napkin lay cleanly on the egg. Place a piece of the napkin that you cut up over top of the Mod Podge. I like to try to and lay out my designs ahead of time so that I have a loose idea of what it’s going to look like. If you’re going to add other pieces of the design that won’t overlap the first, you can add those on now as well. Just carefully add pieces next to each other and smooth them out on top of the egg. Use a small wet paint brush (dipped in water) to smooth out the edges of the napkin so that it’s easier to add additional napkin pieces on top. Let the first layer of decoupage napkins dry on top of the egg for another 20 minutes then continue with a second layer if desired. Continue carefully adding additional pieces of napkin over the Mod Podge, smoothing them out nicely, until you get the design you want. Make sure to let individual layers dry in between so that all of the pieces don’t just stuck together.
3 – Let the eggs dry
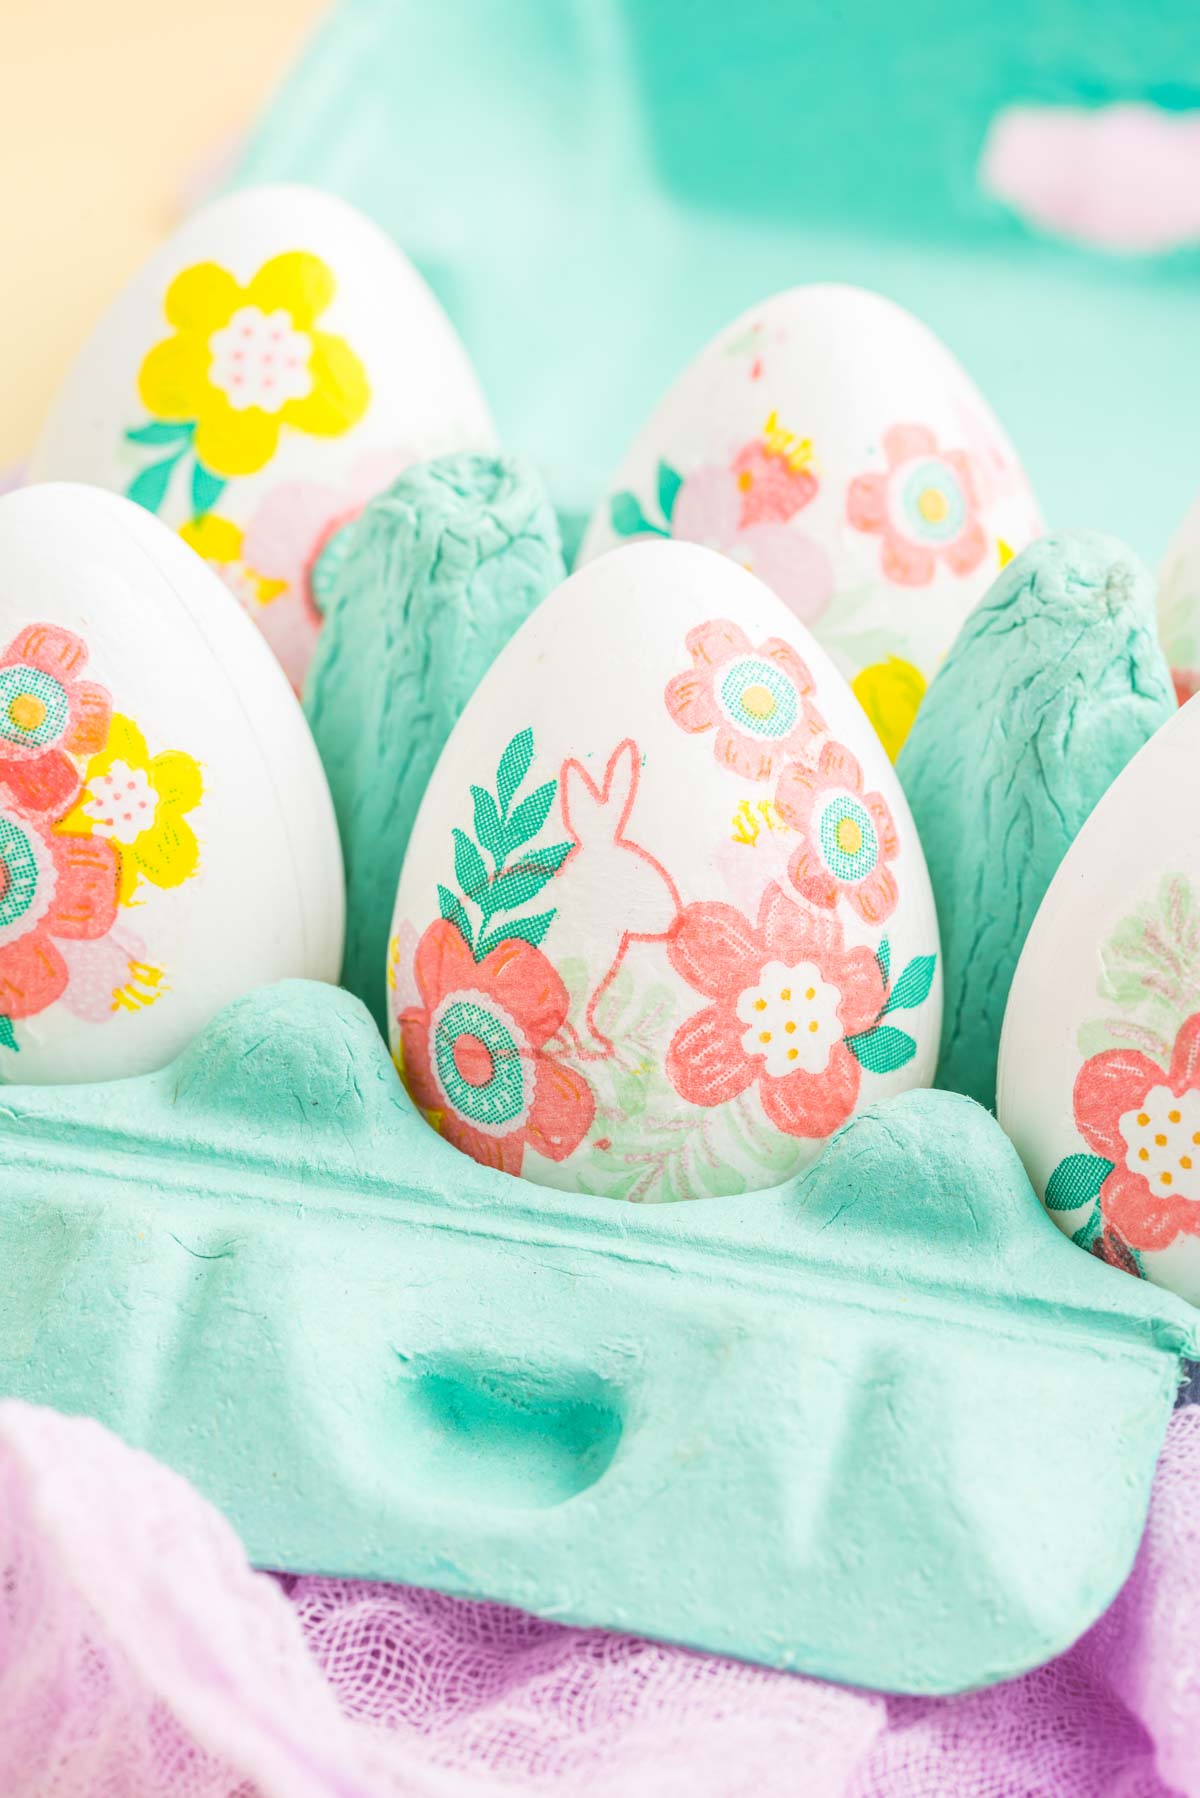
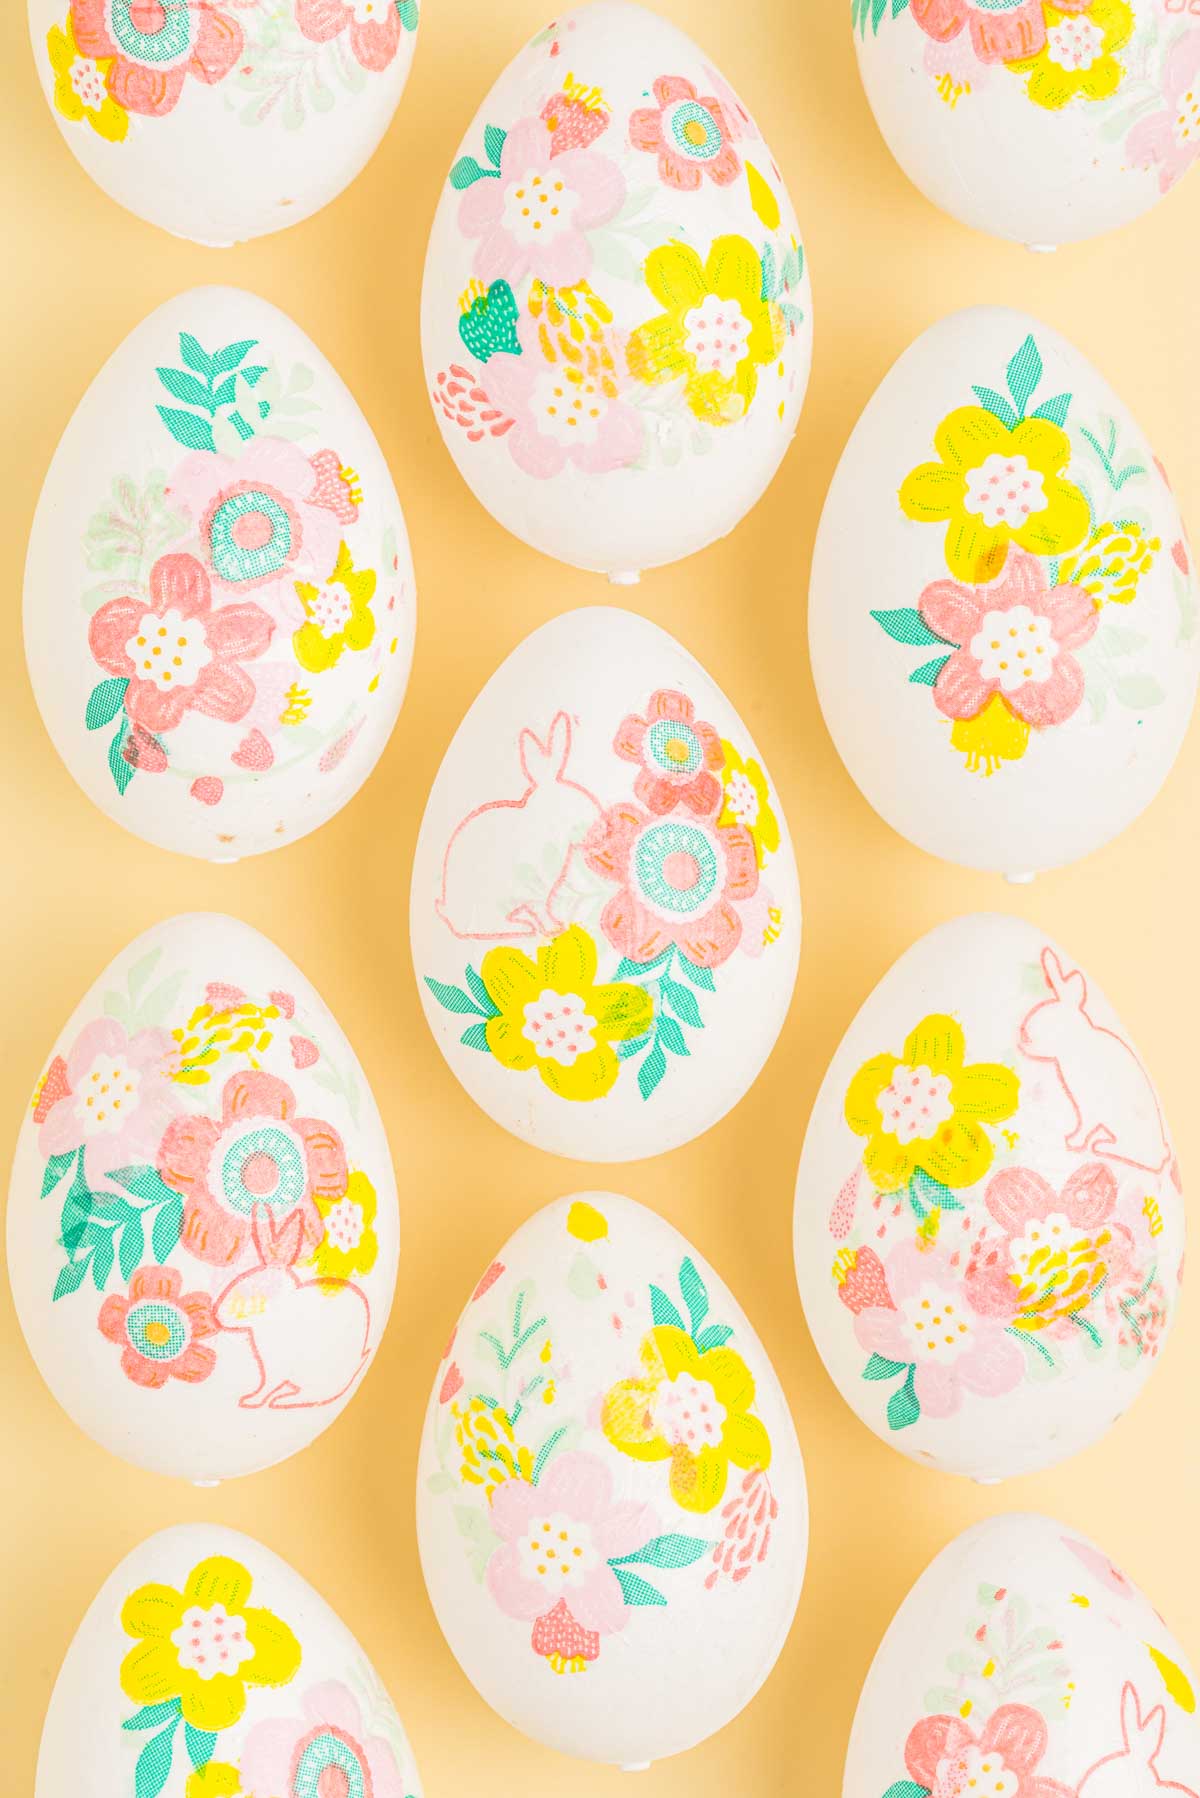
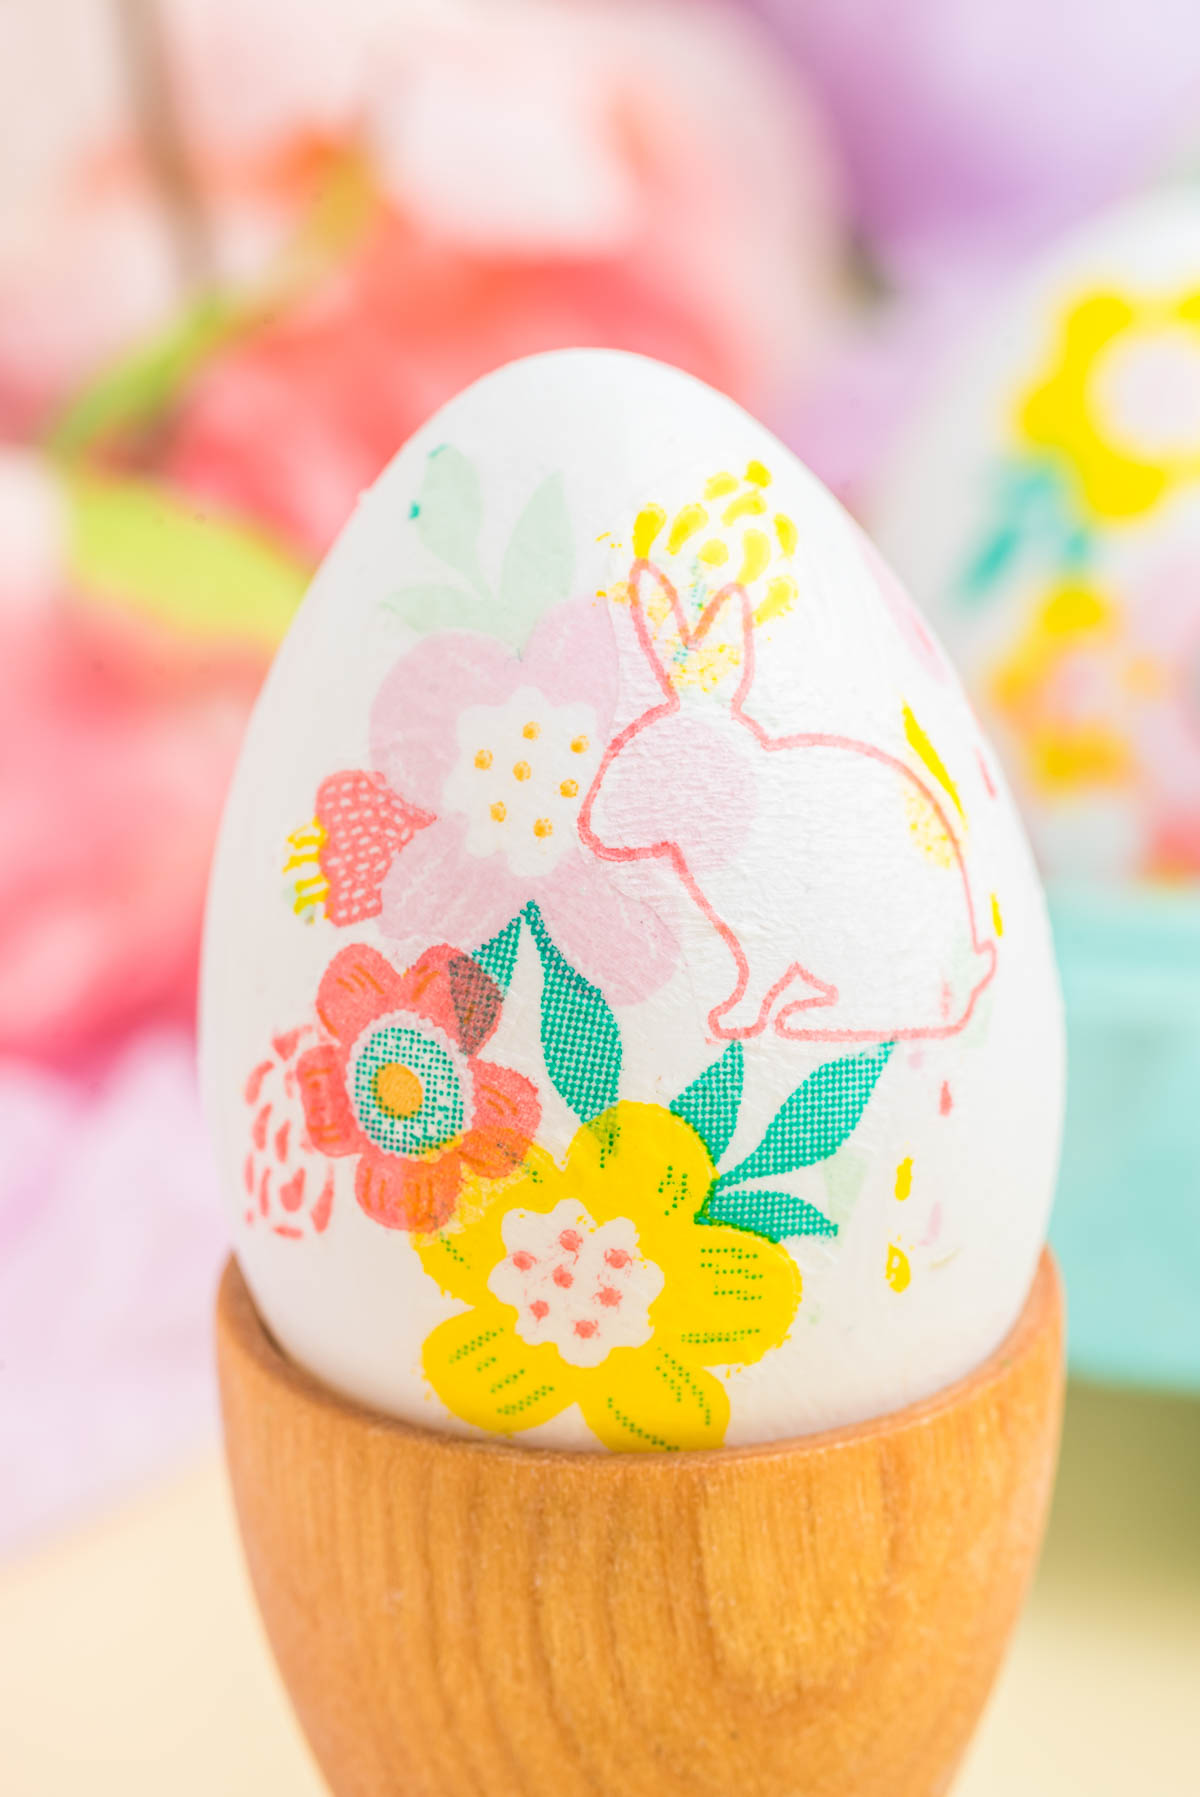
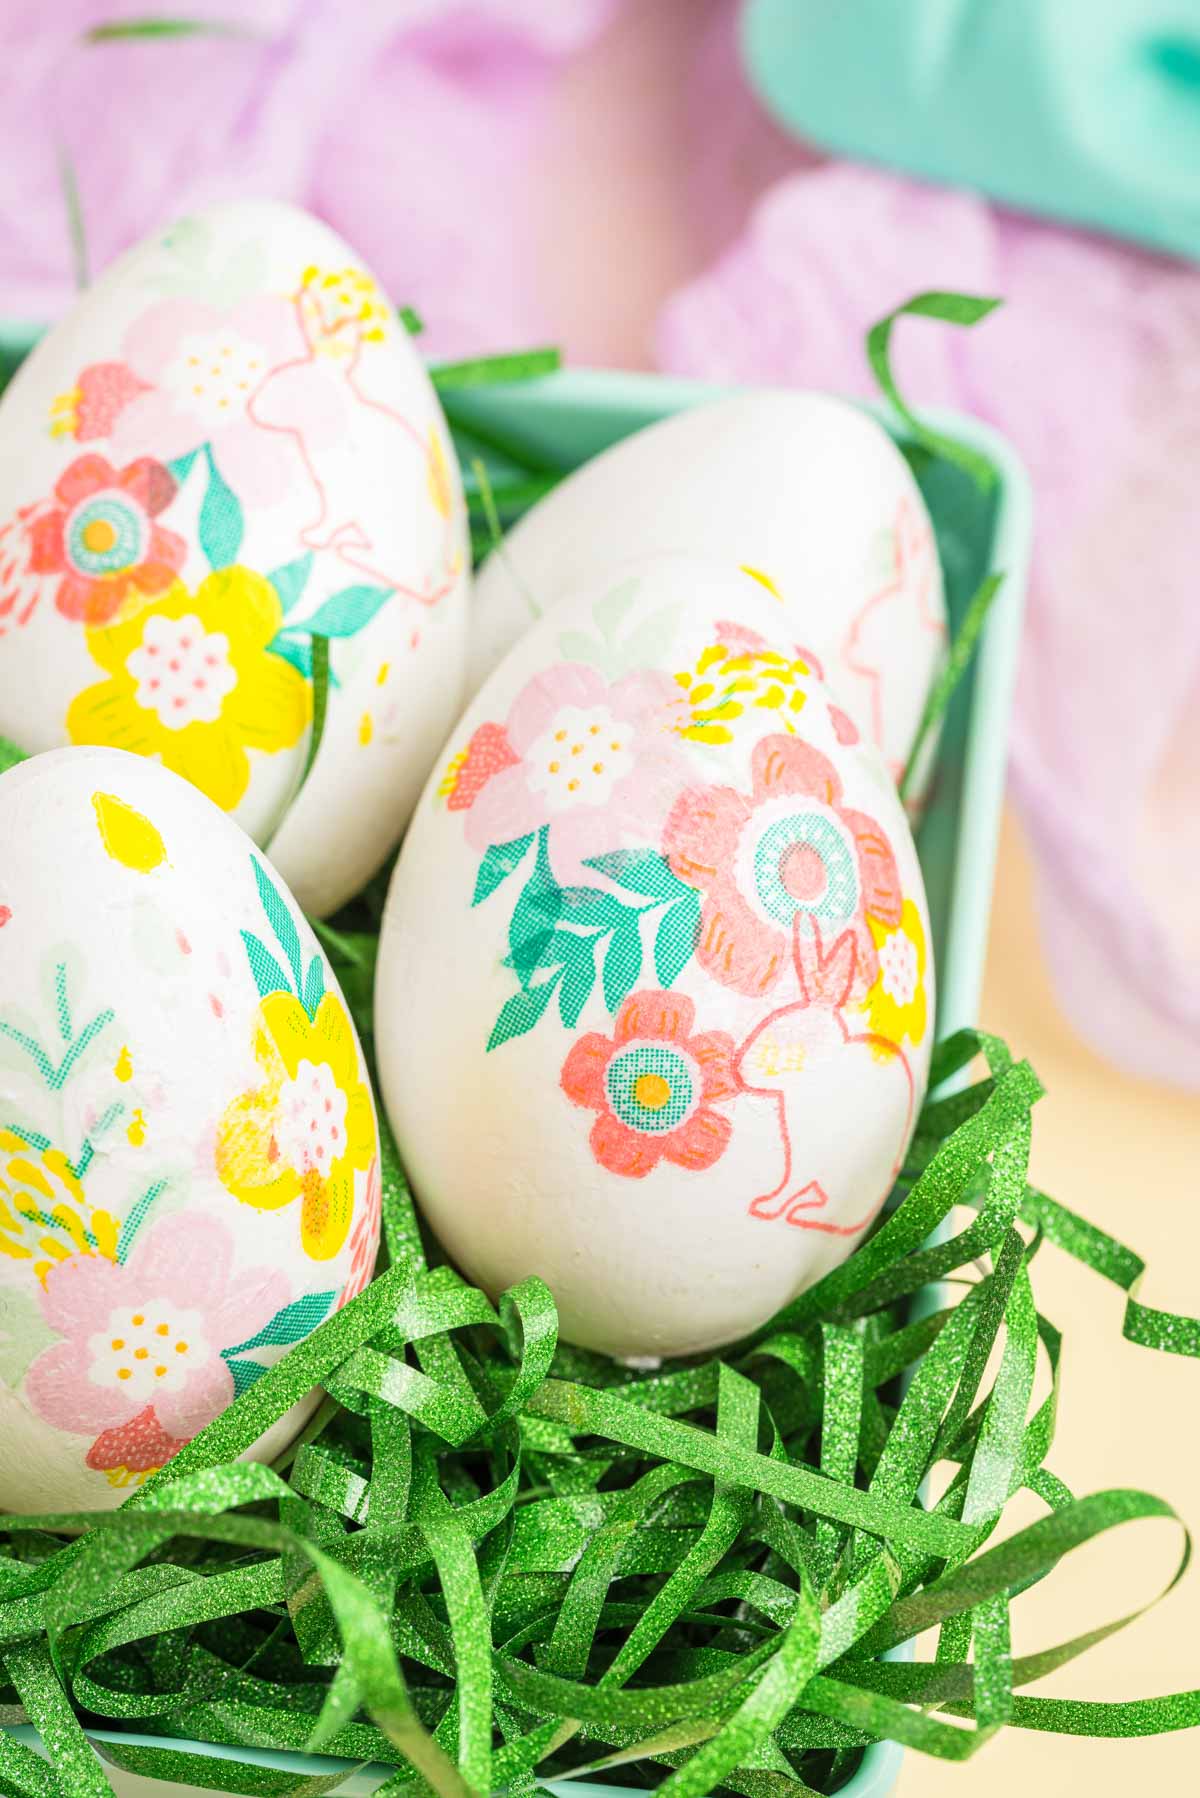
Finish the rest of your eggs and set them up to allow them to dry completely before touching them. You can do this by laying them on a piece of wax paper or placing them in an empty egg carton to dry. If you want, you can left the first side dry and then decorate the other side or just decorate one side of the eggs. I just love how the designs overlap so cleanly and the white fades into the egg so it almost looks like the eggs were painted this way! The most fun part of this Easter craft is creating different designs, layering different things, and getting really creative with these! Try out different colors, different designs, and different patterns all mixed together. And then of course displaying the eggs for everyone to see – I bet they’ll never guess you made these using decoupage napkins!
Expert Tips
Use craft eggs for the cleanest results – clean because they won’t crack if you press a little too hard! You can use hard boiled or hollowed out eggs as well, just be very careful with those because obviously they crack! Craft eggs are also great because you can keep them as Easter decorations for years to come! Cut smaller pieces and more images compared to larger ones. Larger ones tend to crease more when you paint them on, like I found out when I made these DIY candle advent calendars. Make sure the Mod Podge is dry before adding on another layer. Otherwise, you’ll just end up with tons of Mod Podge and the designs will slide around as you try to add additional ones on top. The Mod Podge serves as a glue and you want that glue to be dry. Hot glue some ribbons or loops to the eggs and hang them on a fun Easter tree. You knew that was a thing right!?
More Fun Easter Ideas
Once you’re done decorating napkins, take a break for some of these fun Easter activities!
Easter scavenger hunt – a fun set of clues and riddles leading kids to an Easter surprise at the end!Easter bingo – a set of printable Easter bingo cards perfect for the spring season! Easter egg Olympics – an entire set of Easter games for the entire family that uses just plastic Easter eggs!Easter dice game – a silly game that incorporates plastic eggs, dice, and goodies for everyone! Easter bunny cupcakes – the cutest Easter cupcakes with little bunny ears on top!